Halo 5: Guardians: Game Walkthrough and Guide

Our passage of Halo 5: Guardians on StopGame.RU will begin with several tips to help predominantly newcomers of the series faster to understand the gameplay:
– Health Master Chif is regenerated faster than Spartan Loca. Have this in mind when playing both characters.
– Managing the Spartan Lock, turn on its “Artemis” system to detect weapons, objects with which it can interact, and datapods.
– There is no stamina scale in the game, so you can run as much as you think.
– When you will be in the air, then click on the jump button Re-and your character will clip on the walls on high ledges.
– In the lower left corner of the screen there is a motion sensor on which the movement and shooting of enemies are displayed in red. Do not forget to watch it.
– Pay attention to your team. Help the feet of comrades and give the orders to attack or just move forward. You can also give them a weapon that you no longer need or simply do not want to carry. Do not be afraid to give my rocket.
– Use powerful spartard jerk to break through the fragile structures (walls). For such structures, secret passages or collectible objects are often hidden. In order to perform a powerful jerk, turn away and click on the closest attack button. This technique can be useful in battles.
– When you spell into enemies, follow the red arrows. These arrows indicate vulnerable opponents. Sometimes in order to see the faint place of the enemy, you will need to destroy his armor.
Finally, it is worth noting that the passage was written for the English version of the game, so some words may differ somewhat from Russian localization.
Mission 1. Detachment “Osiris”
If you are a newer Halo series or you need additional help to understand the management of the master Chiff and Spartan Lock, the first two phases of the game will help you get used to the new gameplay features. At the same time you will move forward on the storyline.
After viewing the opening cat-scene, jump in the battle bots of the Loca Spartan and land in the hot zone. The goal of the Osiris mission is to find the location of Dr. Helsi, which is currently in custody forces forces on the nearest planet. You immediately find yourself in a hot point, so be prepared to immediately start battle.
Move forward. At this stage of the game, you will mostly move only right. Destroy the enemies with which to be faced using an assault rifle and a gun Magnum. If there is a desire, then you can pick up a weapon from the dead bodies of the dead opponents. In any case, you can soon end cartridges, so you have to experiment with other weapons. Hold the right side and you will notice the passage through the mountains. Move there and see the door, covered with icicles. Using a powerful spartard jerk, you can break the barrier and go through the door. To do this, turn away, approaching the covered door, and click on the attack button in the near battle to destroy the barrier.
From there, move forward and kill opponents who will stand on your way. Hold on the right and close the protrusion on which you can climb (click on the A button to jump to the stand, and then re-click on this button to cling to it). You should see a number of platforms for which you will need to move on. Go forward without turning off the route, but periodic look at the radar to keep track of opponents that are marked in red. Spartan Lock, character you will manage most of the game.
Continuing to move on, soon you will see a giant door. It is the station of security, from where you can get to a higher platform on the right. Get to the terminal at the top and can take a closer look at the forerunner station. Open the door, go through it to get until the next stage.
From there, move to the left where the road goes. You will see the protrusion by which you can climb up. There will be an open location where you have to fight. Be prepared for serious resistance. Kill all the enemies that you will stand on your way. You are already not far away to Dr. Halsi. If you lose it out of sight, then click the gamepad to visit the goal. Ultimately, you will have to defeat all opponents. Find the doors at the wall on the left and go through them.
After you get to the end of the corridor, you will see the datapode on the right side. Use it to get data. After that, pass through the door on the left side where you will have faced face to face with several prometheys. Observe them. Do not forget to use gamepad to give the team to your comrades to attack opponents.
Then you have to see the door ahead. Come to them and watch the cat-scene, finalizing the first mission.
– intelligence – 7.
– Skulls – 1.
Detached 1
As soon as the game is started and the cat scene will end, then look up, right to see the soil body, lying between two boxes of Covenants. Nearby are the first intelligence.
Detached 2
When you first find out about the ability of the Spartan Lok to pierce the slop walls and see the blocks of ice, then we join the wall and move mainly to the left, where the “Storm” rifle is located. The rifle indicates the direction in which you must go to find the intelligence. We continue the passage of Halo: Guardians on StopGame.RU.
Detached 3
After the first big battle, move on the right side of the card. In the end, you will jump on the platforms where the dead soil should see, next to which weapons will be. Climb the ledge above to find intelligence.
Scull
Before entering the following zone, raise the ledge on the left side of the big door. Follow the edge of the ledge to find the skull.
Detached 4
After you pass through the battlefield, you will see a big krakene in the distance. When it passes by, move forward, sticking to the right side. Go off the path and go on until you see the body of the dead elite with a plasma garnet nearby. Near the DataPode.
Detached 5
In the next battle, kill all opponents, because there will be many. After the enemies are finished, climb the area of two turrets and a large door. Move in the direction of the rear of the right turret, where you can find the dead elite, on a small protrusion. On the right side of it is the Datapod with intelligence.
Detached 6
Before entering the database, where you need to save Dr. Helci, turn right towards the big window. On the front of the window there is a diaper with intelligence.
Detached 7
Another location on which, first of all, you need to deal with opponents. When location is cleaned, move to the platform located on the right side of the exit. On the platform there will be a dead elitge with the device of the Coventov. On the platform is the Datapod with intelligence.
Mission 2. Blue team
After in the first mission, you managed for Spartans Loca, in the next episode to play to the master of the Chif, which commands the “blue team” and performs a different task. You will often switch between two characters for several missions, but they will ultimately be interrelated.
When you arrive at the ONI station, go to the next corridor, turn right, and then go through the door on the left. Continue to move along the path and at the end of the way, find another door on the left side. If you suddenly got lost, then click on the gamepad down the down arrow and find the road without problems.
Understand the soils that will wait for you on location. You can use stealth mode by sneaking to them from behind and pressing the RB button. Or you can go to the frontal attack. After the covenans are finished, find the door on the right side and go to the next room. Ahead of Red Square you will see a column directly opposite. Go around it around and you can pick up the station recording.
Now move forward and deal with multiple covenants with your team, and then go to the data center. After you pass there, find the panel in the middle of the room, with which you can get information from the database.
Find the door on the right and go through it. At the end of the hall you can find an elevator that can be used. Wait when members of your squad enter it, and then click on the Control button. You are climbing the control center. To the right of you will be a metal door. Relieve and hit it using a jerk. You fall, but no damage will get.
There are several members of the Covenant below, which you will need to destroy. Find a cache with weapons on the right side. Here you will be able to replenish the ammunition for the first time. After you finish with this business (you will hear a voice that says that the path is clean), climb up several stairs until you find yourself upstairs. Here you can find the case, inside which lies “Hydra”. If you want to replace the current weapon, you can pick up the “hydra”.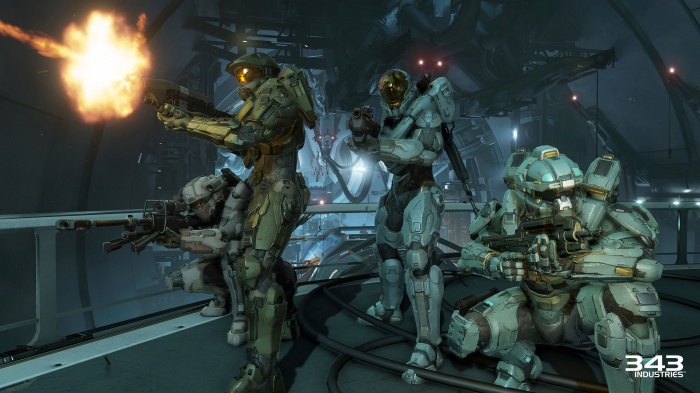 Master Chif and his blue team.
After you get a weapon, you will need to destroy the soils and soldiers of Coventov ahead. You can climb on the hill, from where the enemies will kill easier, especially using a long-range weapon, such as “Hydra”. When they are defeated, you will need to go down in the hall, where Hunter will destroy the earth, and you fall down down.
After the cat scene, move through the dark tunnels below. Do not forget to click on the button “Down” on the gamepad if you are lost. Here you will have to fight with several soldiers of Coventov and, in the end, go through the door. The road that leads to the specified location is not one. So, no matter how you go, you will still come to the desired point.
Complete along the corridor with several windows, where the next door is located on the right side. Go through it and look at the panel to the left of you, with which you can access the laboratory elevator. Go down and fight a couple of hunters. When with them it will end, then on the left side, find another datapode.
Continue to make your way forward and find the cylinder with the inscription “Override Junction”. Go further and activate the design to move. Move down and go to the metal door that you can knock with a jerk. There are many enemies in this room, including soils, sacking and elite. Use your battle skills, tactics and team to destroy them, and then go to the control room at the next level. On the left side you can find the reactor control panel. It will start the sequence. Relieve to the platform of the reactor in the center of the room, and you can return to the bottom of the level.
Now you, together with your team, should turn off the cooling system as soon as possible. Around the column will be various platforms. Use a jerk, jump over the platforms and pick up the aircraft access terminal to start shutdown.
Return to your bakes and blow up ventilation. If you have trouble finding, use gamepad. Make sure you follow the enemies flying around the bishi because they will help damage your ship. Shoot them when you have a chance. After the destruction of all the ventilation holes, find a narrow passage from the bottom to get to the next level. Unfortunately, banshas will have to leave.
You will find yourself in the hangar where you are waiting for several opponents. Destroy them, and then locate the launch control panels on the other side of the room. Obschery more with several enemies, including two hanter;Ensure that before the fight you will have enough ammunition. In the end, puler will be launched.
Move the ship and complete the second mission viewing the cat scene.
– intelligence – 8.
– Skulls – 1.
Detached 1
Master Chif and his team at a certain point will be held on the bridge. At the end of the bridge, you will enter the room where you can see the flicker in the direction of the control point. These are intelligence.
Detached 2
The next location will have two soil. For them is another room with elite, soils and jackals you have to kill before finding intelligence. After the Arena is clean, climb above to the weapon to determine another twinkling point. There are the following intelligence.
Detached 3
New detachable are in a brown corridor, which leads to the control room. Before entering the new location, you will have to climb the walls. When you see the dead body, then move on the corridor to the right. You will need to climb three levels to get to a large platform. At the platform there are intelligence.
Detached 4
Complete on the third level, but first disperse with soils, jackals and elite. When location is cleaned, climb on the left side to see the boxed boxed on each other. Behind these boxes (drawers) there is a vent. Use the jerk to get through the ventilation hole, behind which you can detect intelligence.
Detached 5
These intelligible skip is difficult, as they will lie literally on your path on the main storyline. After you see the ships of the Covenants, go to the corridor to find the control panel with a flickering point. There are intelligence.
Detached 6
After you defeat the Hunters, you will need to jump down through the vent. Before doing this, go back to the elevator, near which the human body will lie. Next to it lies the datapod with intelligence.
Detached 7
When you enter into a large room, then look at four large cylinders. Move to containers on the left side to find the control point marked with orange light. Here there will be a checkpoint with a flickering point where you can find the intelligence.
Skull “Black Eye”
This skull is not so simple as the previous one in the first mission. Will need to apply climbing skills. In the room with the reactor you need to climb boxes. From the boxes, pick up the platform where weapons will be. Turn to the left side and go to another platform. Turn the right side and follow the pipe that goes along the wall. Jump to the platform with the sign “Observe Clean” (KeepClear). Climb on the platform and find the vent hole leading down. Light and in this room, find the skull “Black Eye”.
Detached 8
After you destroy all the ventilation holes, you will need to follow further. Go inside the compartment until you see the second long chamber with a flickering point. It is here that you can find intelligence.
1234
You May Also Like

This is how you get Electric Organs in Palworld
Get ready to fight! With Electric Organs in Palworld you can build be...

This is how you get Ore in Palworld
Including how to get Ingots and a Furnace. Collecting Ore in Palworld...

Palworld guide with tips and tricks
A comprehensive overview of all our tips. Palworld is a mix of surviv...

The Best Heists in GTA V
Heists are back from GTA Vice City with a few more added features and challenges...

Are Revenant Weapons Worth Getting in OSRS?
There are currently three Revenant Weapons in Old School RuneScape: Viggora’s Ch...

Hitman 2: Silent Assassin: Game Walkthrough and...
Hitman 2: Silent Assassin: Passage Before you start reading this passa...