Pathfinder: Wrath of the Righteous: Game Walkthrough and Guide
After launching a “new game” you will be offered to create a character or choose one of the available. Note that for each character there is its own complexity of the game. If you are not particularly familiar with the CRPG genre and role-playing games as a whole, I recommend to focus on the warriors. At the same time, more experienced “rolewicks” can go on a journey together with a magician or priest.
Captured in darkness
Day of the city
At the beginning of the game you will find yourself on a market square, where you will need to somehow pass time. Upon completion of communication, explore the area. Check out the game control elements. You can install the game on the “space”, and if you hold down the Tab key, you will highlight all objects available for interaction. These can be subjects and characters. The map opens standard on the M key. K and E keys allow you to rotate the camera, picking up a comfortable view. On the map there are different markers. The most important characters or objects are usually marked with purple. At the bottom of the card there are all the contests you need. Go down and discover the mannequin. Hit the mannequin to perform one task. Then, the right of this place is looking for a bench for which you can sit down and try the best drink in the city. There will be Yanna Aldori. Singing, interact with a mug to the left, after which watch for a long cat-scene. In the end, the quest will end, and you fall into the cave under Kennabres.
Captured in darkness
You already have the first weapon – light crossbow. However, very soon you will find another. Move through the cave until you meet Siel and Anenevia. If you help Siel, the warrior will be able to pull the anensia without receiving any fines. If the check will be failed, then Siil will get a fine to characteristics. It will be temporary. Siaila is your first companion, while the aneucia will travel along with the group, but finally will not join it. Go on and wait first chest. You can also detect scaly. Keep moving until you meet a new companion – camellia. Here you will tell you about the ability of the detachment, and you can choose Camellia, her healing skill (key “1”) and apply to the girl itself to restore part of health. Kill the first opponents and pick up the second Scaway Terendelev from the ground.
Keep moving until you meet Lanna and Vendagoag. Both will join your team, but only after you carefully wait the room and discover the glowing sword. Interact with him. Choose any options while watching memories. Successful checks will give experience and so on. Show the light, after which Lann and Vendaguag will become part of the detachment, and you can go into the opening in the corner. In any case, you will overcome this blockage. Concederate two spiders. On the left side there is also a second challenge, and behind it – a couple of opponents and a rod for healing of light wounds. Before leaving the location, you can chat with Vendagoag. She suggests to get up on her side and not to show the light.
Moving to Natholm, go ahead and find the leader of the Mongrelov. Can show him light or hide. Depending on the decision taken, after overnight in this camp, Lann or Vendaguag will remain in the team. The first will remain if you showed the leader light, and the second – if you refused to do it. Not far from the chip of the leader there are several characters, and among them Horgus Gverm will allocate. He will suggest the task. Agree. You can bargain, and instead of 1000 coins earn 2000 (after it opens this place). Next to Khorgus will be the first Dyra Shopper. Then open the map, find the story marker and get to the specified hut to break inside it. Having done it, you will lose Lanna or Vendagoag. The remaining character will tell you where to move on. Go to the right side and go to the caves leading to the security labyrinth.
Communicate with Montglasses near the labyrinth gate, and when you are ready, go inside. Examine rooms, collect prey and kill the distraught MONGLES. In a huge hall with two mongrels, in the left corner, the pictures hang on the wall. They have a certain color and point to the solution of the puzzle you will find a little later. From here you can get out of here a few ways. Go beyond the door on the right side. There will be a closed chest. You can hack it, but if you break, keep in mind that all content will collapse, and you will receive only resources. This path leads to flooded tunnels. There will be a hand of hosilles, which has an important note about the torch. By killing, we have a good stay, collect prey and return back. Now go through the doors on the left side to get into the room with a pool of blood. Reach here, inspect the torch on the left. Pull it to open the passage. You learned about the torch from the note that fell out of the opponent in the right wing of the maze, the hands of the hosyl. This path leads to another hand hosille. Concederate the enemy to pick up the magic key. If you have a good room, you will find the Hall of Torture with the Pet. In the corner there are buttons. To solve the puzzle, click on them in the following order:
– Yellow
– blue
– Red
– Yellow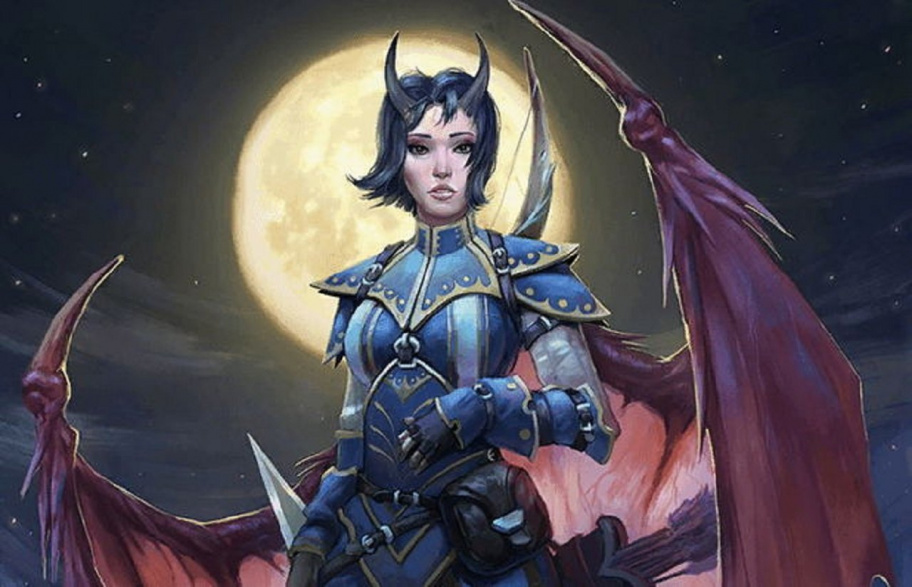 Arushalai, one of the allies of the main hero of Sicvel Pathfinder.
Inside the mystery room will lie the chest with a unique sword called “Shine”. After that, go to the room with a pool of blood and roll through the door to the right. Open the doors with the magic key and find a hosyl. Concederate the opponent and other enemies. By the way, before walking to the hosiler, you can break the camp and break. When you complete the battle, you can drive the Vendaguag (or decide to attack, but it will hide) or allow her to return to your squad. Then climb upstairs and talk to hearabets to complete the mission.
Heritage Guardian
Family secrets of Gvermov
This task can be taken from Khorgus Gverm in Natholma after conversation with the leader of the Mongrelov. You can bargain. In this case, you will receive not 1000 coins, and 2000. But provided that the verification will be successful. You will not be able to continue this quest until you complete part of the plot missions and do not reach the tavern after the battle with Minago. When you find yourself in the tavern “The Heart of the Defender”, talk with Khorgus, which is near the counter. Agree to fulfill the mission.
The next step is to get into the mansion of Khorgus Gverma. In the team must be Camellia. When overcome through the market square and visit Deianna’s mansion Renting (in order to fulfill the instruction “Not the best time for a feather”), move down the map to the estate of Gverm. I remind you that you need to follow there with Camellia. Reaching the estate, talk to Gverm, and then kill enemies in all rooms at the first and second levels. On the second zarus in the disturbance, click the window in the corner to appear the host. Go after him inside the cache and find out the terrible truth. Agree to leave everything secret, which Camellia will definitely be only glad. The mission will end.
Lazes in our ranks
This quest is automatically activated after the destruction of the hosyl. Help Wearace, killing all enemies in the Kenabres fortress. It will happen immediately after getting out of the security labyrinth. So you will reach the restaurant “Heart of Defender”, where you can show the previously received. This will allow you to advance.
Next action – go for exploration in the Estro Tower. Follow the specified location down the map, below the market square, a little right. Here you will find spirits, and after you can talk with a potential companion – Dwarve Grabor. He will show a lot of demons who argue among themselves. So you will learn about the predar. You can attack demons. At low levels of complexity, you will even kill everyone, but it will be difficult for usual or higher, so you need to act differently. Do not attack the demons, and instead, wait for the moment when they attack the “heart of the defender” during the mission “Delayed sentence”. After that, IRABET will say that the best time has come to attack demons in the tower. Go to the location and you can finish off the remnants of enemies. After that, as desired, go down to the basement under the tower to find a pair of characters and several useful items. Tell the Irapete about stripping Tower Estro.
City in fire
You will receive this mission after a conversation with Irazet, when you perform the quest “captives in the darkness”. Clean the first tier and move upstairs. Kill all opponents on the second floor. Do not go away from the hearabets to make it easier to kill enemies and survive. At the third level, you will find Demonse Minago. However, it will disappear and you will need to kill the demons and neophytes remaining in her place. Completely check for mobility, then attack enemies. Show light or select a rage path. If you press the light, some of the enemies will take your side. Observe Minaago to complete this part of the mission.
You wake inside the restaurant “Heart of Defender”. Ira Bet will see a dispatch that is necessary on the task. “Landsters in our ranks”. When you are ready, move to the market square, find the corner of the cleft, scattered doors and windows. Create from these parts the bridge and go to the other side. Follow the right after the bridge to discover at the top of the cartoon character. It must be done by a personal quest of Siaila. You can also find necromancer. Kill and get good booty. When you find yourself directly on the square itself, where the holiday was held at the beginning of the game, move to the right and look for the passage there. You will run up a frightened servant, who will tell about Deianne rent and activates a new order “Not the best time for a feather”. In the same side will be Halron and Rienen. Listen to two characters. You can attack someone from them or silently leave. So the mission “Roast dispute about faith” is activated.
Return to the square where there was a holiday, and move up. Catch with two plugs. Help them. They will tell about the secret entrance to the gray garrison. After you visit the Tower of Estro and discover the narrator in the library of the “Black Wing” library, you can talk to the Irabette about how to attack a gray garrison. When you want, tell me the warrior, that it is time to move into battle. When read the gray garrison, the mission will come to an end.
Inside the garrison there are several magical essences. If you can collect everything, then conversation with a teacher Complete the instruction “Restoration of Golden Yarn”. Here there is a puzzle with statues, notes on the elven, which is looking for a narrower, and much more. At the second level there will be a locked door. Keys are located in a distant room, then the P-shaped corridor. Opening this door, move on the third level to meet the demon. Destroy the enemy, as a result of which the quest will be completed. Exit location.
Common cause
The mission will automatically start after you communicate with the Irabette in the tavern “Defender’s Heart”. Inside it, look for dwarf Stonton Wain, located near the stairs. Chat with him to update the mission.
Next step – go to the “Black Wing” library. But before you visit the market square. Looking directly on the stage of the stage leading upstairs. Climb on them and discover two plugging. Go through athletics, as a result of which they will agree to join you. Tell them about the tavern “Heart of Defender”. These will be the first assistants who will take part in the storm of the gray garrison. A little further you will find the Mongrelov. Pass the verification by conviction, as a result of which they will go to the tavern “The Heart of Defender”.
Complete the mission “Roast dispute about faith,” without killing Ramiene. Talking with him Tet-A-Tet, return and convince Halran. As a result, the priests are disinaway will help during a gray garrison attack. Leave the market square and go up to the library “Black Wing”. Do not listen to anyone, because the true crusaders are connected and are about to be burned. So you need to attack Caleb and his squad. Be sure to go through athletics 12 to save the knights of a fiery spear. They will join you during the assault. Talk to the narrator and tell me that they are ready to accompany him in the “heart of the defender”. Thanks to this, you will automatically move to the desired location. Catch with a teacher inside a restaurant. He will give you a ring as a remuneration. Mission will end after you storm a gray garrison.
Deferred sentence
Quest will automatically begin after you communicate with Irabette in the tavern “Defender’s Heart”. Wait for the moment when you need to repel the “heart of the defender” from the demons attack. It will happen automatically. A random meeting with the messenger will occur on the map. Chat with him and agree to return to the restaurant. During the defense of the “heart of the defender” for a start, kill opponents going through the right gate. After that, it will be necessary to destroy the Big Minotaurus and all the arsonists throwing bommas. When the arsonists appear, you can not pay attention to ordinary enemies. Do not forget after the battle to take prey from the wagon with corpses. She stands outside. mission accomplished!
Jewish waters
Inside the restaurant “The Heart of the Defender”, talk to the Yernug, which is located at the door in the kitchen and protects the way to the dungeon. When you can do this, go to the location of student water, talk to the locals and help them destroy monsters. The mission will end.
Knife
Inside the tavern “Defender’s Heart”, talk with a shape autumn haze, which is located near the passage to the dungeon. When you get to the market square after studying the “heart of the defender”, go straight and create a bridge. So you will complete the instructions “Dissected City”. But do not hurry. Before the created bridge, roll to the left to see the wounded elf named Calesus. Collure the girl and talk about different topics. You can kill something asks forn, or believe it and spare. Run ahead, I emphasize that Forn is a liar, so whenever you meet the elf, do not kill it. But after sure to tell about these meetings. Sooner or later you will meet on the wounded forn map. Caylese will appear. Believe it, and you will see true enemies. Kill everyone. Kalessees in any case will kill himself. Either you will do it.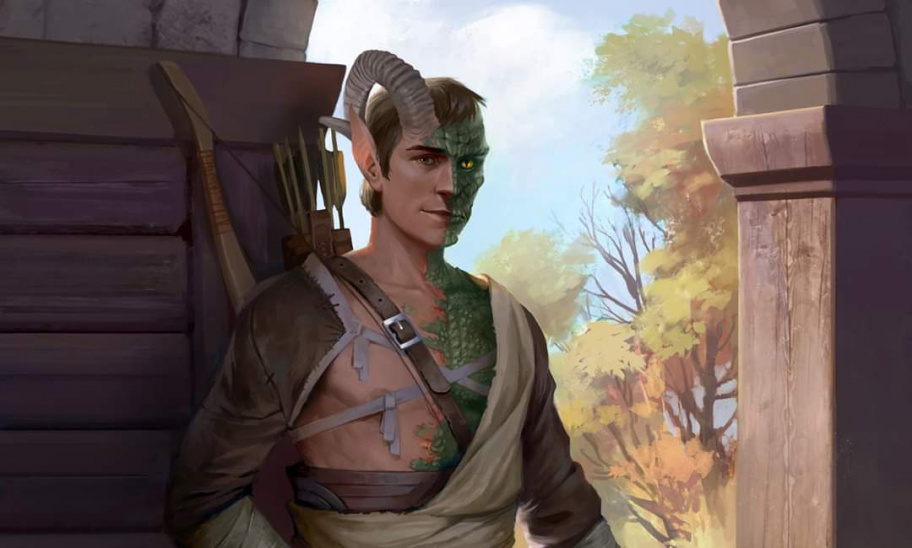 Lann, one of the allies of the main character of Sicvel Pathfinder.
Roast dispute about faith
Following the market square, you will come across Halran and Ramiene. Carefully examine the situation. You can attack one of them or silently leave. So the mission will begin “Roast dispute about faith”. Follow the square where the holiday was previously held, look at the right side to meet the servant of Count Deianna Renting. Go to the hill with a fence and talk with Ramiene. Do not attack the priest, and instead, give your consent to the peaceful resolution of the situation. Left to convince Halran. Talk to Harlan in the same place where he met her earlier, and return with good news to Ramiene. The task will be fulfilled, and the priests will join you during the assault of the gray garrison.
Look fixed to the stars
When will come across Ramiene during the passage of the mission “Roast dispute about faith,” if you don’t kill a monk, see Ilkess. This task is activated during its appearance. Communicate with Ilkessa, which asks to find her priests. Next, move to the mansion Renting Deianna, where to find Aranka. Kill all enemies and talk with a girl located near the musical harp. Come back to the market square. Move to the homemade bridge, with which they moved through the crack in the ground. Here you will find Kenabres Knight. Show him a handkerchief received from Aranki and he confess that in fact it is the priest. Pay for his defense when Harlan appears, after which I follow the temple of the detain of the market square, where they met Rainene, and talk to Ilkessa. mission accomplished.
Vallest blade
Beginning of a long journey
Mission is automatically activated after stripping the gray garrison. You can explore the camp, chat with different characters, or immediately look at the main tent and talk to the queen of Golfri.
Banner over Citadel
When grab the gray garrison, you will find yourself in the parking lot. Perform the task above, then go to bed. The bed is located inside the tent of the commander. Complete a number of checks with different skills, and then leave the tent. So you can get to the global map. It is necessary to gradually follow up, to DRESEN. If there is an obstacle in the form of a pillar – Fort of demons – switch to the army and kill all enemies in step-by-step battles. Once a week you can order new fighters. On the way to Dreats, a random meeting with elves will be held. This is an ambush, so at any convenient moment attack robbers. In the end, you will get to the Location “Smile Lesson”. Here you must destroy the swarm. When studying the territory, you can launch the mission “Music Abyss”.
When you get to DRESEN, you can continue the mission. When the city’s gates open, follow the inside and kill some of the demons and cultists. In DRESENE there is a gate to the left, right and in the middle. You can go here through a prison, killing giants on the walls. Storm the gate is needed alternately. If you study Drezen’s dungeon, you will meet Arushalai. This is a potential companion. You can kill it or let go here already decide. Select out to get to the main region of the city. On the walls there is a staircase leading to the roofs. Climb there and open the gate for the allies.
Continue to walk along the wall, kill the giants, and the mission will be updated (when the last giant dies). Go off the walls to detect the passage in the ruins. This is an extra, optional location. There will be supplies, as well as a place to rest. Kill all enemies and return to the main goal. You can proceed to their assault. While your allies break the gate, you must destroy all the emerging enemies. If you work out all three areas, you can storm the second gate. When you break them, meet a powerful demon. In battle you will help the very grab. Killing the enemy, climb on the walls and enter the ingestion of the fortress driming, using the passage on the right above. But before you can talk to the Vilser Garms.
Inside the fortress, you will find an elf named Yaniel. Free the girl and move to the statue. There will be several enemies under it, but nowhere to go down here. We’ll have to carefully examine all the dungeon and find the way to the altar. First go up the map to find Yoran Wain. Try to convince him, but everything is in vain. Killing Yoran, you will find a closed door, followed by cultists and demon. It will be a dangerous enemy no matter what level of difficulty you have chosen at the beginning of the game. The main thing is not allowed to transform him. Open the door and kill the cultists, 2-3 will be enough. So you interrupt the transformation of the main demon. Fight the corpsy, which in itself is a strong enemy. Street as long as possible, treat your fighters and so on. She will use the disguise, so it’s hard to get on the enemy. You need a character with excellent armor and a large stock of HP. Apply the protection potion on it, drink potions for healing wounds, and the remaining characters attack coat.
In this room there is a descent to the altar. Kill the enemies and click on the banner. If you still have a potion of healing, it’s time to use them, because further you will be waiting for a long battle with a horded demons. In the same room there is a door behind which a pool with human corpses is located. Kill the Guli and Demons and talk to Yaniel, who will show the secret way to the Vlinch Variety. Go there and see a trap with a mystery. You must rotate the rings so that it turns out a one-piece pattern consisting of three parts. To do this, use the plates in the floor. Turn them in any order and connect by selection. It is pretty simple. If you do not want to suffer, you can try to run to the blade of valor right through the trap. Take the banner and hang it on top of DRESEN. Choose the mythical path. Go up and meet Stonton Wain and Minago. Attack Stonton, and when the health stock will be minimal, the battle will end. The recycling of the traitor and collect resources. Exit the outward from driming to complete the chapter.
1234
You May Also Like

This is how you get Electric Organs in Palworld
Get ready to fight! With Electric Organs in Palworld you can build be...

This is how you get Ore in Palworld
Including how to get Ingots and a Furnace. Collecting Ore in Palworld...

Palworld guide with tips and tricks
A comprehensive overview of all our tips. Palworld is a mix of surviv...

The Best Heists in GTA V
Heists are back from GTA Vice City with a few more added features and challenges...

Are Revenant Weapons Worth Getting in OSRS?
There are currently three Revenant Weapons in Old School RuneScape: Viggora’s Ch...

Hitman 2: Silent Assassin: Game Walkthrough and...
Hitman 2: Silent Assassin: Passage Before you start reading this passa...