Echo: Secrets of the Lost Cavern: Game Walkthrough and Guide
Look at yourself under your feet and take the knitting of the twig. Wrap towards the exit. Outside, an aggressive lioness is waiting for you. Choose a wooden stick from the ground and tear off a piece of ice floes from the cave. Go to the far end of the cave. Look down. Choose from the ground a bundle of dry grass and crawled out of soft wood.
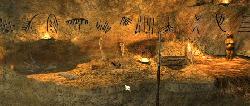
Look at the stones laid on the ground in the shape of a ring. Put in the center of the rings knitting the twigs, bundle of dry grass and is crawled from soft wood. Use a wooden stick on the linen to ignite the fire. Now the cave has become light and warm. Look at the rock paintings and a group of colored stones on the wall. Click on any stone to reproduce the roller showing the person of the painted wall of this cave. At the end of the video, you will have a color stone terminal in the inventory. Consider it from close range in inventory.
Look at the ground. Find among the places of small stones a bunch of red pigment and hook it into your pocket. Turn to the fire and go to the other side of the cave. Pick up a bunch of brown pigment from the ground. Pay attention to the flat boulder with three tools. Turn left and go to the wall with a rocky pattern. Choose black pigment with stones. Turn the face to the side of the fire and take a step forward. Take a little strap from the earth.
Come to the wall with colored squares. Put red, brown and black pigment on a flat stone lying on the floor next to the wall. Wrap to fire and put a piece of ice into the bowl next to the stones. After a couple of moments, ice will turn into water. Use water in the bowl on all three piles of pigment on the stone. You need to paint the stones on the wall, as they are painted on color stone Clem.
Top row on the left – right: black, brown, red
Middle row: black, brown, black
Lower range: Brown, Empty Square, Brown
See the video with the instructions of the terminal.
Come to the giant painting, where three hunters and bison are depicted. Click on the image of Bizon to revive it in the picture. Take a spear in the picture and give it to the bay hunter. Click on the bison, and the hunter will release a spear in the bison.
Choose a branch from the ground next to the wall where this drawing is drawn. Go to the fire and look at the ceiling. Support a branch over fire. Come to the exit from the cave and throw the burning branch in the lioness. Remove the boulder from the passage and leave the cave. Near the cave entrance to pick up a spear and deer horns.
Come in the cave and go to the flat boulder with tools. On the right lies awl, in the middle of the sharp flint and the left scraper. Put the deer horns on the boulder. Cut off with a silicon three branches. Next to the selection of two holes at opposite ends of reindeer horns. Use scraper for finishing and insert the strap into the hole. You got a hoop.
Take the branch near the drawing with the bison and hold it over fire. Go to the exit from the cave and throw the burning branch in the lioness. Get out of the cave.
Climb the hillock and go to another cave. In the center of the cave on the ground are stones laid out the form of a ring. Inside the dry twig is decomposed. You need to divide the fire to light the walls of the cave. Return to the first cave. Take the branch and support it a little on fire. Return to the second cave. Throw the branch of the branch in a dry twig and, in the cave will be light. Let’s study all the catches in this cave.
There are four passages in the long part of the cave. They told them a class in his message from the past. Near each passage on the rock, colored squares are drawn: black, brown, red and square, outlined by white lines (empty). Collect three torches from the ground: one by the fire and two torches near the map engraved on the stone plate. Go to the map and carefully look at her. The map is divided by nine squares with arrows. The beginning of the labyrinth – two parallel lines leaving the external perimeter of the card. The map is similar to the color ornament on the stone of the Clem. If you compare tracks on the map with colored squares on the stone of the Clem, then the path from the labyrinth will be painted in such colors: brown – black – square, outlined by white lines – brown – black – brown – black – brown – red.
Take a torch and support it in fire. Remember that the torch is completely burning eight steps. With a burning torch, go to the cave with a brown square on the left side and the painter of the sun on the right side. Passing through the dark tunnel, you will go to the cave with many outputs. Turn the right and go to the cave with a black square at the entrance. From there go to the cave with a colorless square at the entrance. In the tunnel, burn the second torch from the burning torch in your hand. From the tunnel go to the next cave. From there, go to the cave with a brown square at the entrance and further in the cave with a black square. From it, go out into the cave with a brown square at the entrance and further in the cave with a black square. Light the last third torch and go to the cave with a brown square at the entrance. From there, go to the cave with a red square at the entrance.
After all these wandering, you should be in a spacious cave, where one wall is fully occupied by square tiles with hand prints. Approach Tiles. You must pave a lit path to the top tile. Use the switches below and on the right side to form a track. There are several options for solving this riddle.
When the track to the top tile is laid, you can climb the protrusion. Look at the wall with the fresco to the left of you. On the fresco you will see a sleeping bear near your burgold. Lack of one fragment of frescoes. Find and pick up a piece of leather with two holes. Pay attention to the flat stone with a tool.
Go to the edge of the cliff and look down. To the left of you below near your burgoot sleeps a live bear. Right above him on the edge of the cliff lies a bunch of stones. Move the view upstairs and look at the stalactites under the arch of the cave. If you jump down now, the bear will wake up and attack you. Wrap back. Take the dry herb oakha and throw it down. You will need two hacks of grass so that your landing down is silent for the bear. Take the rope that lay under the grass. Jump down and take the fragment of the fresco. Go up. Insert the missing fragment into the fresco.
Riddle with fresco
Please note that the fresco shows the real situation with live bear. As on the fresco, the bear is at the bottom under the cliff, on which a bunch of stones lies. All you do on the fresco will immediately affect the live bear. Take a stone and give his hunter standing on the edge of the cliff opposite the Berlogs. Throw a stone in the rock a little higher than the burgoots. The bear will wake up and starts to look around. Throw one more stone in Berlnogo. Bear will hide in her burgrel. Now very quickly take a stone and throw it into stalactite under the arch of the cave. Last stone throw in a bunch of stones on the edge of the cliff. Stones will fall down and blocked bear in its berry. The same fate has suffered a live bear below.
Jump down and go to the ripple near the burgold. Choose another rope and three stones from the ground. Close up. Come to the flat stone. Put a piece of skin on it. Take the tool. Make them two holes in the skin opposite the two existing holes. Use two ropes on the holes and take a stonching with three stones.
Go to the cliff and click the graph of slingshot into three stalactitis hanging under the consolidation of the cave. Jump down and go to the ripple near the burgold. Take three more stones. Shot out of slingshot in the last fourth stalactite. Stalactites, falling into the water, form islands on equal distance from each other. Surride on these islets on a narrow strip of sushi separating the lake into two parts. Go to the right side of Sushi, where you pick up the horn of the bison and the long stick. Pay attention to the extinct bonfire on the opposite side of the sushi. Return to the shore with fresco. Use the bison horn on the bore. Now the horn is completely filled with smaller coal. Return to the island in the center of the lake. Use horn with smoldering coals on the extinction. You see the fresco on the wall of the cave. On it depicts deer, rushing to the right left. Directly in front of you are 14 extinct lamps. You must light all the lamps. Take a long stick in your hand and support it in fire.
Calculate the lamps:
Top row from left to right: 1-7
Lower row: 8 – 14
Light lamps 14, 5, 10 and 1.
Arch declares that deer could help him get out of the cave. Consider the fresco on the right left. She depicts deer figures in different positions. Initially, he enters the water, then chosen on the land in the center of the lake and again enters the water to get to the shore. On the island in the center of the lake stands a hunter.
1) all deer should be one color. Slitting on the figures of deer through one, you can change their color: red, yellow and black.
2) Each deer is the arrow. Click on it, you can change the position of the deer. Please note that the deer setting in the water the front hooves must be immersed in water, and the rear hooves emerging from the water should be in the water.
To change the positions of deer, press the cross in the right part of the wall.
3) The color of the feature of the hunter must match the color of deer. Select the position of the hunter ready jump onto a deer. If you are confident in the right choice of all the positions of deer in water and land, then press a double arrow on the right side of the wall and see the exciting trip.
Now you are standing on the other shore of the lake. Get out of the cave. Two tracks extend to the valley. Go to the left track and go through it to the shore of the stormy river. Take a processed stone from hemp. Turn to the right and go along the path along the river. Cut the chamomile on the left side of the track. On the fork, turn on the path leaving in the direction of the wreck. Go through it until you leave the river. Look at the salmon floating in the river. Raise the edge from the ground for harpoon lying between the stones. Go to the next location along the path along the river. Look at the ground. Take the processed stone and long stick. Continue to go on this path, and you reach a rock with red drawings. Look down. Raise the processed stone and clutch from the ground. Go through this track to the next location. Collect barks from the ground. Turn your back to the cliff and go along the path leaving towards large boulders. Going to the clearing, look at the extinct bonfire. Pay attention to the boulder with red drawings. Raise the treated stone and belt from the ground. Come to the flat stone.
Put a long stick on it, point for harpoon and belt. Take the harpoon from the stone and go to the shore of the river.
In the river between the stones there is a small gap, through which salmon saves. Block this gap using for this stones lying on the shore. First, throw a large stone to the water to the left of you. Turn to the right and throw the stone of the near stone to the water to the right of you. Then throw the remaining stones.
Now look like salmon will overcome an artificial barrier. Use the moment when the salmon will be in the water next to the stone barrier, in order to pierce the fish.
Return to the glade with an extinct bone. Talk to a man sitting on the stone near the extinct fire. Ask him all your questions. You will learn that his name is Tar. It is engaged in processing stone and wood. At the end of the conversation, he will give you a marcazite and wooden container for tea brewing from chamomile.
Put in the pit where the bonfire was used before the bonfire. Use for breeding Fire Flush on Markazit.
Take and throw three small stone lying on the ground near the bonfire.
Go to the river. Type water into the wooden container that Tar gave you. Return to the glade. Put a wooden container with water to the ground in front of the Tar. Take a wooden stick from the ground and with it, pull out all three stones from the fire. Try touching the smoky stone. After your Book Tar will give you a wooden shovel. Use a shovel to transfer hot stones into a wooden water container. Water in the tank should boil. Throw chamomile in boiling water, and the Tar will be able to drink fragrant tea.
With the help of a wooden stick Put a large stone into a fire. The same stick pull it out of the fire. Put salmon on hot stone. Using the blades, flip salmon on the other side. Take off the stone of fried salmon and give him Toar. After the meal, talk to him again. After the conversation of Tar puts a fabric on a flat stone, on which three tools will lie. Under each tool lies a stone on which you can try to apply the tool and see what it will turn out.
To the left of you lies a hammer of a deer horns, in the middle – sewer and left stone hammer. Take the stone hammer and hit the middle stone three times. Now take a hammer of a deer horns and hit the middle stone twice. Take the flint and give him toar. In return, you will get a knife with a sharp blade from him.
Talk to Tar about the processed stones that you found all over the valley. Now in your inventory four stones. After your question, Tar will give you a fifth stone. These are musical stones.
Come to the Rock. Right-click on the rocky pattern. In the lower right corner of the monitor, a window will appear with five musical stones, under which lies a small hammer. Take the hammer and hit them 4, 2, 5 and 1 stone. Account goes left to right. Turn left and go along the path to another rock painting.
Click on it Right-click. Now you have access to a hanging rock. Go along the path forward and climb the slope to the residential caves on the top of the cliff.
Talk to teak living in the first cave on the top of the rock. After talking, leave the cave and go to the cliff. Find the hill of animal bones. Next to her on the ground lie deer horns, take them. Return to the cave where Tiki lives. Take from the left shelf engraving with fish and engraving with a deer. Take the stone from the shelf to the left of Tika. Turn to the right and take a statuette of a woman, bone with lion engraving and vertebra.
Get out of this cave and go to the next cave on this side. Take the fat animal from the left shelf. Come to the Flat Stone in the center of the cave. Next to the stone on the ground lies a belt and a stick with a hole. Add them to your inventory.
Exit the cave and come to the skin of animals raised by the walls. Raise off the floor bubble and remove the skin from the fence.
Return to the cave Tika. Go to the left of the cave. Look at the wall on which eleven characters are drawn. Right-click on any symbol and listen to the short Arch story about his travel in the distant Paleolithic. Place characters in the correct sequence of your trip.
After placing characters in the correct order, the arches will say that it would be nice to illustrate each episode of your travel appropriate subject from the inventory. Lay out the stuff on the slab from your inventory in this order (from left to right):
Reindeer horns, bone with engraving, colored stone terminal, kopekemaker, stone with a picture of hands, stick with hole, engraving with deer, harpoon, engraving with fish, knife and figurine women. Go to Tiki and make a conversation with her about the stone of the terminal and about your artistic abilities. She says that you need to restore the fresco that is in the very long cave.
12
You May Also Like

This is how you get Electric Organs in Palworld
Get ready to fight! With Electric Organs in Palworld you can build be...

This is how you get Ore in Palworld
Including how to get Ingots and a Furnace. Collecting Ore in Palworld...

Palworld guide with tips and tricks
A comprehensive overview of all our tips. Palworld is a mix of surviv...

The Best Heists in GTA V
Heists are back from GTA Vice City with a few more added features and challenges...

Are Revenant Weapons Worth Getting in OSRS?
There are currently three Revenant Weapons in Old School RuneScape: Viggora’s Ch...

Hitman 2: Silent Assassin: Game Walkthrough and...
Hitman 2: Silent Assassin: Passage Before you start reading this passa...