Deathloop: Game Walkthrough and Guide

The longest day
After a short introductory video with Giuliana, you first wake up on the beach of black reef. This is the starting location in the game that you visit literally 2-3 times and where you will return in the event of death (for the time being). Move to the bunker, which you see from afar, from the beach. On the way you will be trained the basics of the movement of the character. You will also find your first weapon – Limp-10 gun gun gun. If desired, you can try it on the nearest targets. You can also pick up ammunition. Go inside the bunker and go down the stairs. You will get into the room with a map of the island and attached note. You will learn about all the ideologists on the Black Reef. These are your main enemies. Inspect each entry to keep it in the colts diary.
Next to the card lies the first keychain. These items are used to obtain various character bonuses or weapons. Some even unlock new abilities. For example, you can breathe in a poisonous cloud. You can install key rings only between missions (when you transition from one time of day to another). The staircase on the right leads to a hacker. This special gadget will help you open different doors. Apply it to the antenna above the nearest door. Clamp L1 and wait for hacking. Behind the next tunnel, you will find the door with a code lock. Before you go further, you can enter the code 0451 and get achievement. The door will not open. Go to the right and hit the foot (or shoot a gun-machine gun) on the boards to remove them on the way. Follow through the pipe, go in shallow water, without lingering, otherwise you will die from the cold. Colt does not know how to swim, and will sink on any deep water.
Follow the path, which is located along the water, jump on the protrusions. Running on running on, using sprint to get to a damaged balcony. Next, the game will tell about stealth mode. Commmise the back and eliminate the enemy using just selected by the machete. Create the enemy and click on R1. By the way, you can eliminate goals and without machete in your hands. Go forward and meet new enemies. You will learn how to marry goals and receive information about them.
Before eliminating enemies, you can sabotage the work of the scouting. All scouts are marked with gold. If they see you, they will report all the enemies nearby, as a result will arrive reinforcement of residents. Nearby you can also find special bottles to heal the colts. Move to a big mansion. Hack an antenna located above the door. Sign in. Ahead there is a machine that allows you to fully heal.
In the end, you will need to go upstairs and inspect the only available room. There is a lever. Lower him to see the cat-scene with the advent of Julianna. When you return to the room, jump out of the window from the cliff to see the new video. You “consciously” die, restarting the loop.
Need to go through the same beach again, collect the same items. When you pick up a cracker, you will find the desired code combination on the turnover of the photo. Enter this code on the door outside the door, which will open with a hacker. All codes in the game are randomly generated. Although methods for their preparation are the same. So in my passage, I will not even indicate any code combinations. Anyway, they will not suit you!
Go forward, interact with the dial and enter the code. Explore the new part of the bunker. On the way you will find unique prey in the form of a key chain for weapons, grenades. Grenades are used in three modes. You can throw them, do stretch marks or install mines. A little further, the “reprise” ingot is installed in the door. It will allow you to die twice for the mission (in one day) and return to the task without restarting the loop. The charges of “reprises” are discarded during the transition to another day of day, change loops or the murder of Julianna.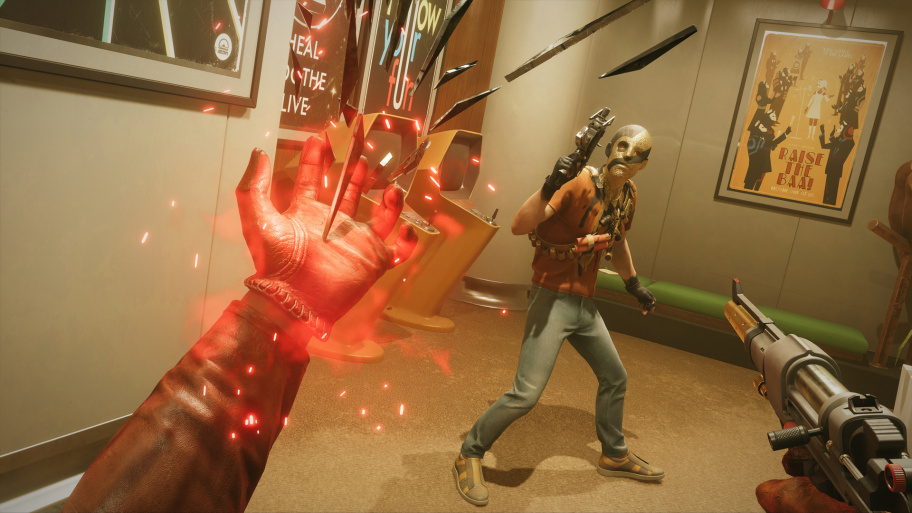 Ingots – the key to the destruction of ideologues.
You also see the setup menu, which will appear between each task. Training system will start, which will hold you on all mechanics. Follow the instructions. Go to Downtown location. Here you will provide much more freedom than before. You can explore the location, its corners, but some buildings will still be closed and will become available as it moves along the plot. Get to a residential building and enter inside through the window. Inspect all messages on Minica, after which Julianna will raise the alarm. Quickly hurry inside the tunnels, from where they came, as residents will start hunting for colts.
Secure down next time. You can explore location or focus on the main task. Get to the cycle control room. You can kill enemies. Try to turn on the projector. Pull out the battery and charge using the device on the left. Check the record on the film projecture to get a new goal.
Leave this location and move on the rock of Frestad. Go to the office marker marker. Hack the door with a panel that is visible through the window in this door. Enter the inside and learn all the notes to get a new task. The note is specified by the Password from the safe in the apartment Colt in Downout. Schedule in the evening at Downtown, but the safe will be empty. And here will appear Julianna. You can not leave the location if she invaded your game. You need to kill Julianna or avoid a meeting with her and turn off the device with a hacker, blocking tunnels. It is marked with a red marker on the map. Julianne usually protects him. In the setup mode before tasks, you can turn off the network game (left at the top) so that Juliana controls exclusively AI, and not other gamers. This will facilitate the task. A good weapon or randomy ingot can fall out of it. Also you will find a lot of brains and so on.
Complete the cycle and visit the downwall in the morning. Enter the code on the safe and take a diary with information. You will learn that to break the loop you need to destroy all the ideologists in one day. And for this you will have to walk and complete all “hooks: ideologues”. Tasks from the “Hooks: Arsenal” menu are associated or to obtain a unique weapon, or with mining ingot and four improvements. You need to get 5 ink and 4 improvements for each of them.
Omnipost
We return to the shelter and go to the place called “Complex”. Then we get a hint how to rewind the time from half a day for a time after noon. Follow the laboratory Wenjie and carefully read the recordings on the board. We take from the table to the device that allows you to collect residuum. Then inspect the recording on the table near the device. You will be aware that Alexis called Wentjse for a holiday, but it will be too busy and can not visit him. I liquidate all copies of Wenjie itself, which are marked by markers. If the device is in your hands, we select prey, which dropped out of the last Vancy to get residuum.
Returning to the console and load residuum through the right side connector. We enter the capsule and shoot from any weapon on the red key opposite. The process will start. Do you die, but we save gear. Now we can destroy ideologues to get and preserve their ingots. You will then become available five missions from the section “Hooks: Arsenal”. Do not dwell on them, since in any case I will come together with ideologists on other storylines. We should not forget that to save the ingots it is necessary to saturate their residium.
Chaos theory
As soon as we think, follow the way to the shelter. Then learn about the saturation of the equipment of the residuum and how to sacrifice the subjects to get the residium. During this mission, you can complete the task from the Arsenal category. Follow in Karlov Bay. We leave through the right door and inspect the note with the plan, which lies on the right side. Learn that residents plan to rob hydroplane. It is worth noting that each find has a picture that indicates what time of day you can use it.
Closer to noon the kidnappers will appear in Karlova Bay. We look down the slope and see on the right side under the rock broken hydroplane. Go forward, and then climb the road on the left side. In the building opposite the van on which the radioist sits, there is an automatic assignment. This is also considered a find. And on the left side of the van we can see another machine, which trades different objects. It will take a battery for him. Follow the marker to hangars and enter the first hangar. Raised above and cross in the bridge in the second hangar. Hear preaching Harriet. We move on the opposite side of the suspended aircraft and carefully kill the first enemy. After that, go on the aircraft, inside which I was standing or worth Harriet. But first find on the table not far away bottle. Take into your hands, we move to the office with red laser rays and throw a bottle in them. As soon as the trap works (and you can shoot in a red button to open the door), we can get into the room and read the note and other letters that are in the computer. The machine is activated by the chain “Ballada Balagen Frank”. The mission will end.
Do not hurry to leave this place. We go into the room and liquidate Harriet to get the ingot “Plexus”. It allows you to combine two enemies and apply damage to both, attacking anyone. We finish the rest of the opponents and absorb residuum from Harriet. You can also absorb it from glowing items that are lying daily in the same places on all locations. Then we return to the shelter and saturate the “plexus” residium. The password from the door on the first floor of the hangar 1 is on the table there, where it is a bottle, on the opposite side of the second floor of the second hangar. You can visit the in the morning Karlov bay and kill Harriet how many times, which will improve the “plexus” ingot. Each ingot has a total of 4 improvements. These improvements also need to be saturated with residuum.
Space Intervention
Follow in the downtown where the mission associated with Charlie. We do it at noon. If you follow my passage, then after the task mentioned above. This task can be completed in parallel with the hook across the Charlie “Offset”.
We go to the location of “unconditional alienation” and, being in place, we kill all enemies. We go to the entrance and go inside the building. Climb upstairs and eliminate opponents on each floor. We try as long as possible not to raise anxiety and not notify the rest of the enemies about your presence. Sooner or later anxiety will still raise. After that we destroy enemies. As soon as we rise to the top and hear the comments of the Tu-bit that the intervention left the atmosphere, we are looking for all the premises by Minic Charlie. We read two letters to appear a new goal of the mission.
On the way upstairs there is room with Tu-bit. It is locked, but we can hack the doors with a hacker, bringing it on the antenna. The doors are located on the floor where the rocket control room is located in the center of the tier (blue room with a large number of consoles). Order Tu-bit evacuate all from the Galaxy. In the building, no one remains except Charlie. Tu-bit will remember this. We are moving around the marker outside the top floor and destroy the red lasers. Do not hurry, because the building has 2 turrets. We can throw grenades (at an angle).
As soon as we get into the bedroom, inspect all objects. Be sure to explore the photo in the frame, which lies in bed. Then learn that Charlie with FIY is on the shore from the cliff Frestad. You can get out of the bedroom through the door to the room with Minic. Do not hurry to leave the location. Choose a hook from Arsenal to appear Marker Charlie. We destroy it and take the ingot “Offset”. With it, you can teleport for a short distance.
We return to the asylum and be sure to saturate the ingot of the residium. After lunch, follow on the rock of Freestad. If the loop was not reset, and you follow my passage, this action will be as follows after the previous location. When they appear on the cliff of freestad, we choose through the door on the right side. Let’s leave this place and turn on the right side of the crushed stall. We pass under the container and see area with appliances and opponents. Moving along the rocks on the right side and go down to the shore. Then on the coastline go to the left side. Walk around the asylum, in which Charlie and Fia are hidden. Learning its content. Let’s leave the Rock of Freestad and carry out the necessary actions in the shelter. Follow in Karlov Bay. It is noteworthy that Frystad’s cliff is not available in the evening. We go to the building with a machine gun Yerva and open Count Charlie. We study the diary, and the mission will end. Two new missions are automatically activated – “What Waintjie want” and “Afternoonful joy”.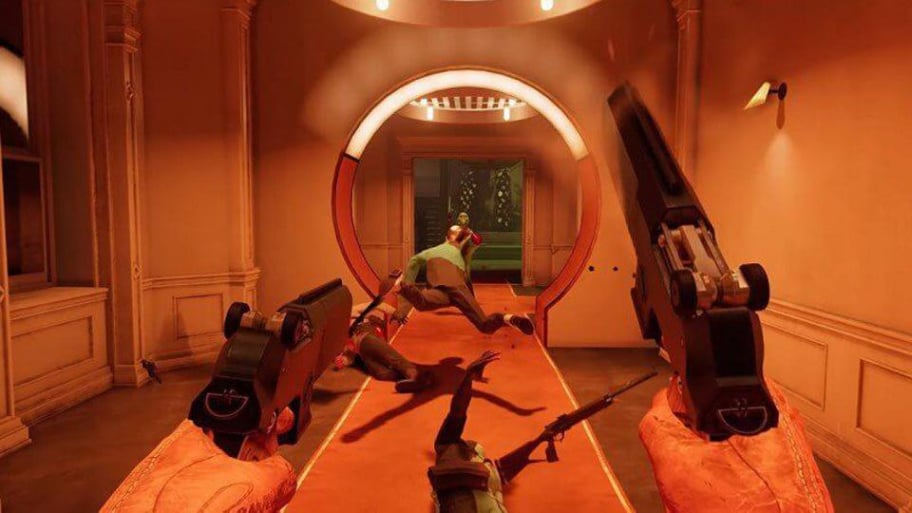 Some weapons in the game can be used as a pair.
Incredible agility
This mission is activated after we first find ourselves in Karlova Bay. On the task “Space Intervention” will need to find in the evening in the Karlova Cryph. Through the loudspeakers heard Charlie, after which the task will begin. We follow the path on the right side of the building with Yerva and see that a large building is now open. We enter into and pay attention to the box with a unique shotgun.
To get it, you need to complete the game Charlie. On the wall there is a scheme of a district with blinking points. They indicate where to look for boxes in which there may be a gift or dynamite. Search all these places and open boxes. Every time you should go to a safe distance. Open all boxes. Some will explode, and in others will be mining. For example, keychain for weapons. After the destruction of all boxes will open the door to the right of the scheme with light bulbs and a box with a unique shotgun. One of the boxes can be found in the second hangar. But he will be inactive. Do not shoot it, otherwise the task is canceled. If this happens, we go out to the main menu and load the game. Thanks to this, you will find yourself in the evening in the same location. To activate the box in the second hangar, we click on several levers. The first is located near the box itself. And the following will be:
– We move on the opposite side by the aircraft and activate the handle on the left side.
– We pass forward and go through another aircraft (within which you could find Harriet). Go down to the ledge with the third handle.
– We climb the same aircraft and go to the right side of the upper floor, we return the aircraft, which is in the middle, and jump on the left side. At the beginning of the room there is another switch.
– again on the main aircraft we climb on the right side and we turn right right right. On the edge of the platform, we are looking for a penultimate handle.
– We return to the aircraft, which is in the middle, and activate the last handle.
We can then open a box with a gift. There is another challenging box. The light bulb in the diagram indicates the mountain where the fortress is worth (the left side of the card). However, the box should be sought under the mountain and fortress. There is a pub with the scenery of green jungle. To be inside, omit the handle at the central door. The countdown will begin. Need to determine the password from the door in three minutes. Behind this door hid the box. In the pub trying to find tips to the code. The first is near the door. The red mark shows the position of the numbers in a four-digit password, and the red sector on the circular scale – digital value. Another cheat sheet is on the right side of the door (connect). Two others 3 on the second floor.
These are the two most complex boxes, and with the rest of the problems will not arise. Some boxes for you will open residents (enemies). As soon as you unlock each box, we return to the building where weapons are. Open the door on the right side and go beyond. If ingots are needed, we divide the boards from the left side of the switch and intercept the field control of the field, and then turn it off. After that, activate in the order we need several handles. The first is located near you.
– avoid blue lasers, climb and follow the far corner by the rays. Then, in the corner, with the help of boxes we rise to the floor above and try to find the second handle.
– turn around and pass by vertical blue rays. We turn on the left side to overcome the barriers with the same rays and activate the handle that is in front of you.
– Wrap and overcome the same obstacles by following the reverse way to lower the fourth switch.
– We return to the second handle, which was activated earlier (when they rose by boxes). We jump onto the first floor and activate the handle in the corner, it is near the descending gate.
– We go to the handle at the stairs, which leads down and activate it.
– Again the boxes in the far corner of the first floor, as they did along the way to the second handle (on this list – the first). We pass vertical rays and move through two obstacles in the middle of the second floor. Then we turn on the right side, to the last handle. If we have time, we return to the case and take the shotgun “Heritage”. If the time is over, you will have to repeat everything from the very beginning.
Ballada Balaguar Franka
This task can be taken or run in the morning of the next day. We go on the marker to the rock club Frank. We enter the building, pre-taking a class-pass from the device on the right side. Unfortunately, when using it, you cannot activate ingots, including “reprzy”. Moving through the club and eliminate opponents. Raised the stairs in the far part. We hate camcorders and turrets and we will be in the bedroom Frank, above the recording room in which Frank himself is located. We do not pay attention to him. We rise to the bedroom on top and try to find the same device in bed. Remove the Class-Pass. Ingots are re-active. We are looking for in the corner by Minic and inspect the records to find out information about Otto and Fireworks. A new task will appear.
But, before leaving this place, we complete the task “all night long, which is described below. We go after lunch to the downtown when you can perform the mission “Afternoonful joy”, which is described even below. We go to the place called Karlova Bay and go to the workshop Otto. Go to him follow after lunch or a little later. We visit the shop and see that it is destroyed. We read a note that hangs on the left side of the door. We go in the morning at downtown and go to workshop Otto. We inspect the installation for the production of fireworks. The problem is related to the fact that a large amount of supply devices is connected to this installation.
We pass on all the luminous wires and remove a large device and small electrical panels. One of the wires will lead you to a building in which we will meet many gold opponents (radioists). Trying to intercept control of each device or kill them imperceptibly. If the alarm is raised, there are several dozen enemies here. Wires fused, so we are looking for several electrical panels in the building. Let’s leave this location only when you make sure that each wire is no longer glow.
Next you need to get a password. Do it at any time of the day, except in the morning. That is, if the workshop Otto is safe and preservation (we just save it in the morning). We go to the downtown and go inside the workshop. We read notes on the minico with a password from the container in Karlova Bay. We go to Karlov Bay. In its left left corner (if you oriented on the map) is the bastion. We climb in the open window inside and read two more notes. One can find under the door. Please note that a note with a password will lie under the door, at night. Then come back here after lunch and climb inside. We use the offset to get around blue and red lasers, otherwise the panel will be blown up. Open the door and speak with Peak Rexley. After that we can eliminate the girl. Get to the container and open it. We interact with the installation and choose the item “Hold Cords”. This mission is completed.
All night long
The task will begin after only I get to Frank’s sound recording studio. In the bedroom from above, you will have to learn his letters and listen to the record on the recorder. There is also a device that will allow you to get rid of class-pass. Having done it, go down. We destroy opponents and get up before armored glass, followed by Frank. After a while he will notice the colts and calls for the rescue. We go to the bedroom and activate the turret. Eliminate opponents, and after destroying the ideologist, who will leave his studio. Mission complete. A unique automatic “Constancy” will fall from Frank.
12
