Necromunda: Hired Gun: Game Walkthrough and Guide

Chapter 1. Caerus
A member of the guild of merchants was killed, the award was appointed for the killer. You with two mercenaries allegedly know where to find it, and went after him. Attack together to grab the criminal and get a reward.
Choose the appearance of the main character (which can be both a man and a woman), and then – and the level of complexity. After the video, move the only route by performing simple techniques to which the game indicates. In the end, you can even run around the walls. Job on three walls, turn on and go to the opposite side by pipe. Interact with the panel to open the door, and talk to the prisoner to open a big gate. Go through them.
Outside, move through obstacles and open your first chest (1/5). All of them on this mission five pieces. Inside the chest will lie new weapons. Hold E to pick it up. Z key allows you to open the “Weapon Wheel” and choose the desired. Relieve up the platform with a green light bulb and jump on. Raising the stairs, eliminate the attack from behind the enemy.
Go down, call the mastiff with the C key and kill enemies. Be sure to look at one of them and clamp C to attack your mastiff. Only after that the mission will continue (if not to do this, the enemies will appear to infinity). Go back to the left and find a staircase in the room. There is a chest (2/5) with the next gear. Return back and go through the opened gate by killing three enemies behind them. Go down. After the explosion, hush the mouse wheel and activate the first-stimulator. Keep moving and clean the big room from all enemies. They will appear from different sides. When the terminal is highlighted, interact with it to open the passage down.
Go down to the bottom and move through the corridor, killing enemies. Do not step on Lava. Continue following, run through the wall and at the very end of the way will come across the first row. He will throw explosive rats. Stay away from it and be prepared to make a breakdown of a fence or back to the left Ctrl. So you will decline from its rats. After the victory, clean another location and get to the exit, where the video will start. The mysterious killer will run away.
After the mission is completed, you can choose which items to leave, and what to sell. To leave anything at yourself, switch between tabs, select an object on the LKM and set it into one of the selected equipment cells. The remaining items will be automatically sold. And it is not the worst option! We continue the passage of Necromunda: Hired Gun on StopGame.Ru.
Martirz-End
Martirz-End – the largest settlement in this part of the Pole, located on the ruins of the ancient Imperial Sanctuary. It is surrounded by industrial domes that have greater value for Orlock and Goliath houses. In the settlement there are simplishes and merchants, through it there is a constant stream of prospectors, hunters for heads and gangsters of local gangs. Guilders watch everyone who comes to Martinz-Neand forgot about the hostility and strictly observed all the laws. Amazing but they have it. But not always ..
At the very beginning of the task, a new weapon will be unlocked for you. You can explore it. Communicate with a doctor who establishes augmentation. You can buy the first improvement. In this settlement there are several useful NPCs, including a weapon merchant, bartender, artisan. You can also get into the gladiatorium, where you fight the enemies, experiencing new weapons and augmentation. The names of all cvetic characters will be highlighted in yellow (or even orange). Communicate with them alternate, including Cal. In the end, the marker will indicate the terminal on which you need to choose the following mission. Optionally, you can perform side tasks, but we will focus exclusively on the plot.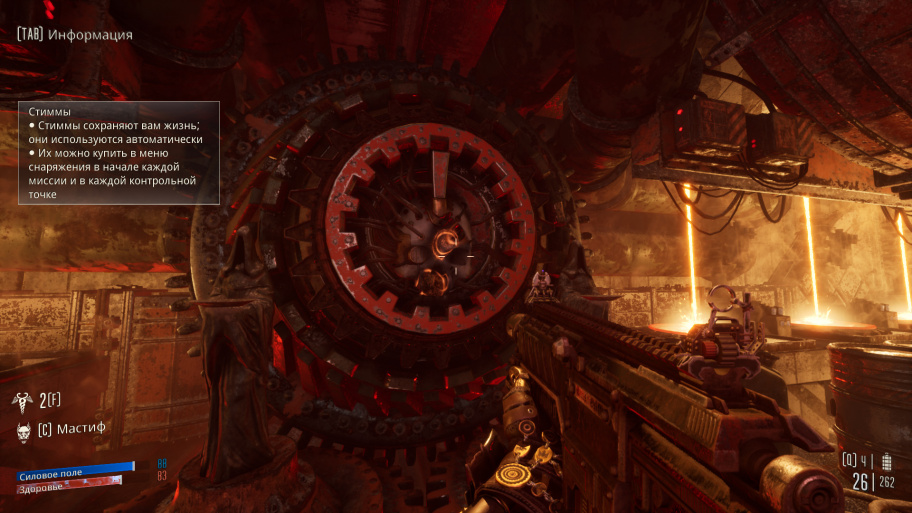 Follow the stocks of stimulants because they allow you to rise. You can always buy stimulants at any checkpoint.
Chapter 2. Colossus 44
Orlock Iron Vaipers captured Brikgo, leader of a powerful Goliath gang. Now Iron Vaipers are trying to transport him to the old cargo train on the territory of Orlocks. The difficulty is that Iron Vaipers at the same time with Silver Talon. But the breakdown of their plan can give useful information. Peel into the train and direct it to a safe place away from the territory of Orlocks.
Go down on the right side where the marker indicates, and use the elevator. Rising upstairs, get to the locked door of the block number 32. Climb on the roof of this block, especially since you have a double jump. Here is the first chest (1/9). Clear inside through the hole in the ceiling and follow the corridor until you can open a new door. Kill all opponents. The latter will come down on the elevator – the perfect option to throw a grenade and kill everyone. Hurry up to get to the cargo train.
Train moving forward through the cars. Clean the first car, hitting there on any of the two side elevators. At the end of him, at the lower level there is a door. Go through it, kill enemies on the other side and double jump jump into the long-distance platform to be in a new car. In the middle of the car, on the right and left there will be two lifts. Both are topped to the chest with prey (2/9). At the end of the car, go through the bottom door, kill enemies and jump over the next car. If it does not work, take advantage, use the chains on the left and right, by which you can run on the other side.
Keep going through the car the only route. Here will appear the first enemy mastiffs. When climb up to pass through the passage, go to the opposite direction, under suspended fighter. There are some more enemies and an open container with a chest (3/9). I immediately discovered two side elevators. Climb up and move on top of the car. Jump to the fighter, and from it – even further. Purchase inside by jumping on the rising gates. Kill the opponents who arranged an ambush. Go to the building under the big sphere (the conductor will say that you are somewhere nearby), and immediately roll over the device to the right, because the chest hidden there (4/9).
Immediately saved your time. When you kill enemies outside and go down, jump on the platform of the previous car is not needed. In the wagon with sand you have to fight with the first robot. And followed by him – with another one. They act in the same way. Despite the seeming difficulty, everything is quite simple. I strongly recommend taking a shotgun and get close to the robot. Tell around the enemy and shoot it. When he is stunned and his eyes will start glowing red, more he will not shoot or let rockets. The robot will try to close and attack the near shock. And this is the simplest. Shoot it in it, let me come closer and bounce back or sideways using the left Ctrl. After clearing the location, climb the passage in the opposite end and watch the cat scene.
Rear to the top using hook (SHIFT key). Wide in the protrusions with green light bulbs. Go on top of the car, avoiding ceiling lights. You can detect them in advance, on the stains of light. Go aside in order not to face them, otherwise you will die and spend the stimulator. Go around the marker and go down, inside the car with cameras. Select from behind the grille, passing back and using open hatch. Kill the enemies. Here will appear the first opponents with shields. Use the hook to snatch their shields. Also friends will appear. As for me, they are best to throw 1-2 grenades. Interact with the creature inside the control room, go down and go through the opened gate. We continue the passage of Necromunda: Hired Gun on StopGame.RU.
Get down to the freezer cameras. But on the way, be sure to look at the side room to find another chest (5/9). In addition, when cleaning the camera and free the prisoner, jump into the hatch and move in the opposite direction. Climb the stairs and between the boxes are looking for a chest (6/9). Move to locomotive, dodge the green beam to avoid a powerful mercenary attack. Win everyone, climb the side pipes and hook grasp for the top. Clean the cut and use the helm to steal “Colossus”. This captive needed to save on the plot task.
Martirz-End
Talk to the bartender and conductor, and then select a mission. If desired, you can buy new augmentation or make some kind of improvement.
Chapter 3. Generator
Iron Vaipers approach the generator who controls Goliath gang Steam Dogs. Iron Vaipers also just announced outlawed, so you can earn a lot of loans, destroying them. But be careful: Escher’s gang Black Serpents also sharpens tooth on them.
By the way, before the start of the mission, do not forget to install equipment into each of the available slots. What you take equipment upon completion of the mission is good, but for its equipment you use the menu that appears before starting the task!
You will find yourself in a landfill. Two factions will fight here, and both for you – hostile. Destroying enemies, move forward and with the first opportunity to turn right. Sooner or later, a marker will appear, indicating the terminal with which to interact. It is indoors with a chest (1/5) and an elite opponent. Win the enemy, open the chest, and then jump onto the protrusion with the terminal. Runing the rocket, you do a hole in the wall. Get to her, evading turners. And I even managed to go to the prolve on top. Getting inside, jump into the pipe and climb above, jumping on platforms.
Next will be an area with knotters. I recommend to kill all enemies standing on top. To get close to them, use the hook. In addition, teleport bubbles will appear in the following field with a generator. They are best attacked in the near battle. After victory, raise yourself to the control panel and start the generators. And then run around the marker and use the other terminal. Clean the area, kill the main opponent. By the way, near the console that you launched the generators should have been lying a sniper rifle. Here she can come in handy! After the victory, see the video and kill the arrived reinforcement, and then the mission will end.
Chapter 4. Station Guyster
When Iron Vaipers were announced outside the law, they hid on a semi-closed cargo station. To get to it, you need to turn on the old drilling rig and go through the drill mine. But not only you are looking for Iron Vaipers. Steam DOGS and several other Goliath gangs lead war with Orlocks for the sphere of influence. And they are unlikely to agree to be your allies ..
Move the only route and jump down, on the ground with red grass. Unfold and see green tunnel – you go there. Move at the other end of the territory, kill enemies and run the terminal. The drill will rise only after you kill all enemies. First there will be many warriors with shields. Kill them in the near battle. After the more cruel opponents, using mastiffs and casting explosive rats appear. As soon as you kill the latter, the drill will rise. Open the gate to another terminal, jump below and kill enemies. Upstairs in front of the rotating screw there is another terminal. Interact with him to open the following gates. There is no chest behind the trunk, so do not waste your time. We continue the passage of Necromunda: Hired Gun on StopGame.RU.
Run away from a huge bulldozer, running jumps and pods on Ctrl. Open the door and bring all obstacles. Jump over the pit at the very end, after the bora. You will find a spacious territory on which you need to destroy four ambots. They will be stationary, but around these robots there is always a big accumulation of the enemy. About one of the robots, on the roof there is a chest (1/5). Another ambot will be in the cave, and at the gallery on the left you can detect the second chest (2/5). When you destroy four ambots (the last two will already fight against you), go to the train and start fighting the enemies. They will appear indefinitely. Watch for the task. Sooner or later you will be offered to get out of here. Follow the marker inside the crane and raise up the stairs. Select even higher and run through the arrow.
Chapter 5. Gopnu-Peit
After the clashes with a stranger, you were captured to the Goliath gang with Steam Dogs, with which you faced earlier. You need to escape from the Goliath base. Remember that you are not alone – you have a faithful friend who will be happy to help ..
Climb the stairs on the side and take a backpack with your equipment. Activate the terminal, go down and find the opened pipe in the far corner. Jump down through the next pipe and kill the enemy. Go to the long room and pick up the hole on top. Clean the large hall, go to the next room, where enemies with hammers and energy shields will appear. Do not let them get closer to you. There will be a valve that you must turn. Return to the hall with a bridge and see a large sphere with blinking light bulbs. Blow it down to open the way further. The artisan will allow you to significantly modify weapons. And we are not talking about cosmetic, but just about technical improvements.
Clean the following place from enemies. At the end, three machine gunners will appear. When you defeat, go around the marker and jump through the hole in the ceiling. Here will be a chest (1/3). Exit through the hole in the wall, save and take a new weapon. The following room will have one enemy and hole in the floor. Jump through it to find the second chest (2/3), which you could have previously seen behind bars. Climb above, Clean the room and use the panel to open the way. Here you are waiting for the battle with the boss. He will constantly help the same mobs. They appear without end, so you should be distracted only to fill the reserves of health and armor. At the first stage, the enemy will attack fists in the near battle. Shoot it, and when he gets closer and wakes up, make a rollback back to Ctrl. At the second stage, the enemy will use a powerful machine gun. Tell around it and shoot from the most powerful weapons.
After the victory, rise above and go along the lighted corridor behind bars. This path will lead to the console. Interact with him and jump through the hole in the floor. Go across the pipes. In the first room, jump through the hole in the wall on the right and up on the ledge on the left to find the last chest (3/3). Continue movement, kill the enemies and pick up in a changer for hot lava. She will rise up. As soon as the Chan stops, select on the surface with the help of a hook, otherwise risks to be in a container with lava. Kill all opponents. Sooner or later they will begin to appear on the elevator at the location center. Win the last enemies and log in to this elevator to complete the level and return to Martirz End. We continue the passage of Necromunda: Hired Gun on StopGame.RU.
12
You May Also Like

This is how you get Electric Organs in Palworld
Get ready to fight! With Electric Organs in Palworld you can build be...

This is how you get Ore in Palworld
Including how to get Ingots and a Furnace. Collecting Ore in Palworld...

Palworld guide with tips and tricks
A comprehensive overview of all our tips. Palworld is a mix of surviv...

The Best Heists in GTA V
Heists are back from GTA Vice City with a few more added features and challenges...

Are Revenant Weapons Worth Getting in OSRS?
There are currently three Revenant Weapons in Old School RuneScape: Viggora’s Ch...

Hitman 2: Silent Assassin: Game Walkthrough and...
Hitman 2: Silent Assassin: Passage Before you start reading this passa...